728x90
게시판처럼 페이지를 나눠서 데이터를 보여주는 방법을
라이브러리 없이 React에서 만들어봤다.
작동 순서는
접속 => 데이터 패치 => 페이지 처리
정도로 보면 되겠다.
데이터가 보여지는 컴포넌트
// Paginatoin.jsx
import { useState, useEffect } from "react";
import { Paging } from "./Paging";
import axios from "axios";
export const Pagination = () => {
const BASE_URL = "http://localhost:3001";
// 전체 데이터
const [commentList, setCommentList] = useState([]);
// 로딩처리
const [isLoading, setIsLoading] = useState(true);
useEffect(() => {
if (commentList !== []) {
setIsLoading(false);
}
}, [commentList]);
// 데이터 불러오기
const axiosGetAll = async () => {
const { data } = await axios.get(`${BASE_URL}/comments`);
setCommentList(data);
setPage(1);
};
// 첫 접속 시 데이터 패치
useEffect(() => {
axiosGetAll();
}, []);
// 현재 페이지 데이터
const [pagingDataSet, setPagingDataSet] = useState([]);
// 현재 페이지 설정
const [page, setPage] = useState(0);
const handlePageChange = (page) => {
setPage(page);
};
// 인덱스 배열을 만들어 페이지별 순서 생성(숫자12는 page per items)
let indexArray = Array.from({ length: 12 }, (item, index) => {
return index;
});
let pageIndex = [];
pageIndex =
page === 1 ? indexArray : indexArray.map((item) => item + (page - 1) * 12);
// 현재 페이지 데이터
const pagingData = [];
const dataFetching = () => {
for (let i = 0; i < indexArray.length; i++) {
if (commentList && commentList[pageIndex[i]] === undefined) {
break;
} else {
pagingData.push(commentList[pageIndex[i]]);
}
}
setPagingDataSet(pagingData);
};
useEffect(() => {
if (commentList !== []) {
dataFetching();
}
}, [page]);
return (
<div>
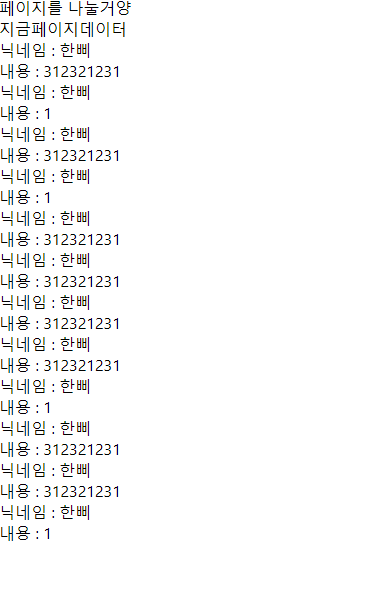
<div>페이지를 나눌거양</div>
<div>
<div>지금페이지데이터</div>
{isLoading ? (
<>로딩중</>
) : (
pagingDataSet?.map((item) => {
return (
<div key={item.id}>
<div>닉네임 : {item.nickName}</div>
<div>내용 : {item.comment}</div>
</div>
);
})
)}
</div>
// 새로 만들 페이징 컴포넌트(현재 페이지 등 페이지 번호들)
<Paging
activePage={page}
itemsCountPerPage={12}
totalItemsCount={commentList?.length}
prevPageText={"<"}
nextPageText={">"}
handlePageChange={handlePageChange}
maxItems={5}
/>
</div>
);
};
위와 같이 작성면 데이터를 붙이고 페이지를 구분해주기 직전 단계인 것이다.
최대한 Paging 컴포넌트가 받는 props를 통해 자동적으로 처리해주기 위해 코드를 구성해봤다.
activePage: 현재 페이지
itemsCountPerPage: 한 페이지당 보여줄 데이터(아이템)
totalItemsCount: 총 데이터(아이템) 개수
prevPageText: 이전 페이지 버튼에 사용할 텍스트
nextPageText: 다음 페이지 버튼에 사용할 텍스트
handlePageChange: 지금이 몇 페이지인지 변경해줄 함수
maxItems: 한 줄 묶음에 몇 개의 페이지를 보여줄지 설정
페이지 구분 컴포넌트
// Paging.jsx

import { useEffect, useState } from "react";
import styled from "styled-components";

export const Paging = ({
  activePage,
  itemsCountPerPage,
  totalItemsCount,
  prevPageText,
  nextPageText,
  handlePageChange,
  maxItems,
}) => {
  // 페이지 버튼 총 길이
  const totalLength =
    (Math.ceil(totalItemsCount / itemsCountPerPage)) < 1
      ? 1
      : (Math.ceil(totalItemsCount / itemsCountPerPage));
  // 버튼 총 길이를 배열로 생성
  const pagingArray = Array.from(
    {
      length: totalLength,
    },
    (item, index) => index
  );

  // 현재 페이지가 바뀔때마다.
  // 페이지 묶음의 몇 번째인지 설정
  const [listNum, setListNum] = useState(1);
  useEffect(() => {
    setListNum(Math.floor(parseInt((activePage + maxItems - 1) / maxItems)));
  }, [activePage]);

  // 한 묶음에 보여줄 페이지 넘버
  const listNumIndex =
    listNum === 1
      ? Array.from(
          {
            length: maxItems,
          },
          (item, index) => {
            return index;
          }
        )
      : Array.from(
          {
            length: maxItems,
          },
          (item, index) => {
            return index + maxItems * (listNum - 1);
          }
        );

  return (
    <PagingUl>
      <li
        onClick={() => {
          if (activePage !== 1) {
            handlePageChange(activePage - 1);
          }
        }}
        style={activePage === 1 ? { backgroundColor: "#e9e9e9" } : null}
      >
        {prevPageText}
      </li>
      {pagingArray.map((item, index) => {
        if (
          listNumIndex[0] <= index &&
          index <= listNumIndex[listNumIndex.length - 1]
        ) {
          if (index + 1 === activePage) {
            return (
              <li
                key={item}
                id={index + 1}
                className="activePage"
                onClick={() => {
                  handlePageChange(index + 1);
                }}
              >
                {index + 1}
              </li>
            );
          } else {
            return (
              <li
                key={item}
                id={index + 1}
                onClick={() => {
                  handlePageChange(index + 1);
                }}
              >
                {index + 1}
              </li>
            );
          }
        }
      })}
      <li
        onClick={() => {
          if (activePage !== pagingArray.length) {
            handlePageChange(activePage + 1);
          }
        }}
        style={
          activePage === pagingArray.length
            ? { backgroundColor: "#e9e9e9" }
            : null
        }
      >
        {nextPageText}
      </li>
    </PagingUl>
  );
};

const PagingUl = styled.ul`
  margin: auto;
  margin-top: 50px;
  width: 300px;
  display: flex;
  justify-content: center;
  justify-content: space-evenly;
  align-items: center;

  & ul,
  li {
    list-style: none;
  }
  & li {
    width: 35px;
    height: 35px;
    text-align: center;
    font-size: 25px;
    border-radius: 5px;
    background-color: rgb(216, 236, 252);
    transition: 0.6s;
    cursor: pointer;
    &:hover {
      color: white;
      background-color: rgb(60, 177, 255);
    }
  }
  & .activePage {
    color: white;
    background-color: rgb(60, 177, 255);
  }

  & li:first-child,
  li:last-child {
    background-color: rgb(162, 214, 253);
    &:hover {
      background-color: rgb(60, 177, 255);
    }
  }
`;
스타일 컴포넌트로 만든 CSS는 이전 프로젝트때 사용했던 것을 가져와봤다.
커스텀은 어떻게든 가능하다.
위와 같이 설정해주면 다음과 같은 화면을 볼 수 있다.
맨 처음에는 아무것도 모르고 패키지를 사용했던 것 같은데
직접 구현해보니 CSS를 적용하기도 편하고 생각보다는 직관적인 것 같다.
728x90
'개발일지 > React' 카테고리의 다른 글
| React useNavigate로 props 넘기기 (0) | 2022.10.05 |
|---|---|
| React submit 이벤트 방지하기 (1) | 2022.10.02 |
| React-responsive mideaQuery 반응형 적용해보기 (1) | 2022.09.26 |
| React 카카오맵 API 사용해보기 (1) | 2022.09.24 |
| React 무한스크롤 만들어보기 (1) | 2022.09.20 |


댓글