부드러운 스크롤 적용 방법
behavior: "smooth" 속성을 scroll 이벤트와 scroll 메서드와 같이 사용하며 부드러운 스크롤 이동을 적용해볼 수 있다.
본 포스팅은 Nextjs13 환경에서 작성되었다.
scroll 메서드
scroll() , scrollTo()
scroll(x,y) || scroll(options), scrollTo(x,y) || scrollTo(options) 와 같이 사용할 수 있다.
사실상 두 메서드는 동일하게 작동한다.
xy 좌표를 통해서도 사용 가능하며 options를 적용한다면 아래와 같이 사용할 수 있다.
window.scroll({
    top: 0,
    left: 0,
    behavior: "smooth", // smooth: 부드럽게 전환 , auto: 즉시 이동
});

window.scrollTo({
    top: 0,
    left: 0,
    behavior: "smooth", // smooth: 부드럽게 전환 , auto: 즉시 이동
});
scrollBy()
scrollBy(x,y) || scrollBy(options)
scroll()과 scrollTo()가 특정 좌표로 이동한다면, scrollBy는 특정한 길이만큼 스크롤을 이동시킨다.
옵션과 예제는 아래와 같다.
// 기본 사용
window.scrollBy(x,y)

// 한 페이지 아래
window.scrollBy(0, window.innerHeight);

// 한 페이지 위
window.scrollBy(0, -window.innerHeight);

// 옵션
window.scrollBy({
    top: 0,
    left: 0,
    behavior: "smooth", // smooth: 부드럽게 전환 , auto: 즉시 이동
});
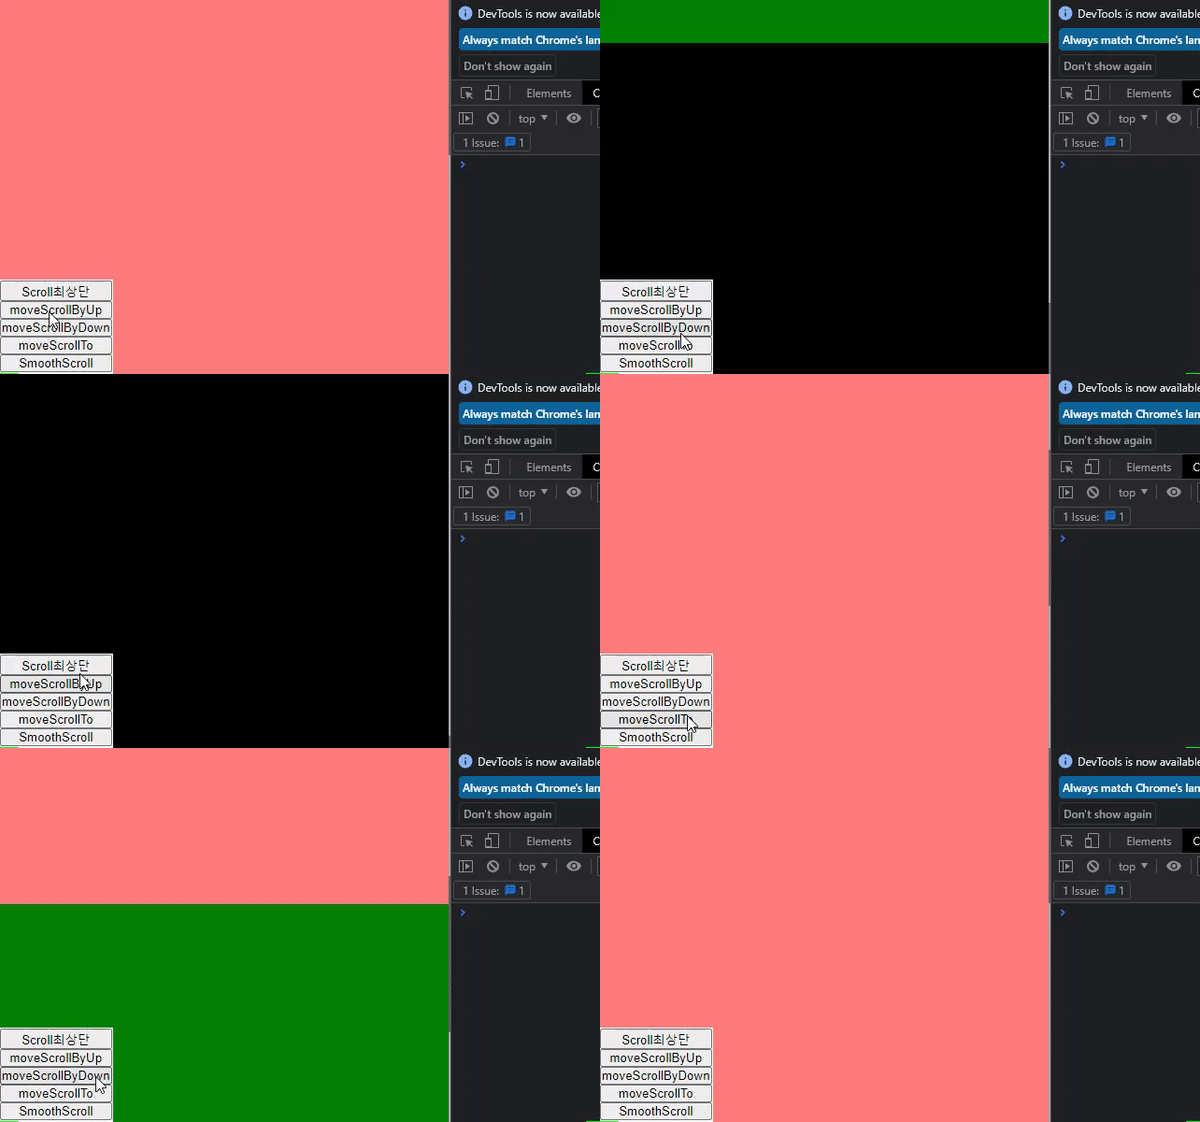
scroll 메서드가 적용된 화면과 예제코드

  // 최상단으로 이동
  const moveScroll = () => {
    scroll({ top: 0, behavior: "smooth" });
  };

  // 한 페이지 위로 이동
  const moveScrollByUp = () => {
    scrollBy({ top: -window.innerHeight, behavior: "smooth" });
  };

  // 한 페이지 아래로 이동
  const moveScrollByDown = () => {
    scrollBy({ top: window.innerHeight, behavior: "smooth" });
  };

  // top 500 위치로 이동
  const moveScrollTo = () => {
    scrollTo({
      top: 500,
      behavior: "smooth",
    });
  };

// jsx
<Container>
  <NavBtn>
    <button onClick={moveScroll}>Scroll최상단</button>
    <button onClick={moveScrollByUp}>moveScrollByUp</button>
    <button onClick={moveScrollByDown}>moveScrollByDown</button>
    <button onClick={moveScrollTo}>moveScrollTo</button>
  </NavBtn>
  <TestContainer1 id="box1" />
  <TestContainer2 id="box2" />
  <TestContainer3 id="box3" />
  <TestContainer4 id="box4" />
  <TestContainer5 id="box5" />
  <TestContainer6 id="box6" />
</Container>
크롬에서 behavior: "smooth" 속성이 적용되지 않을 때
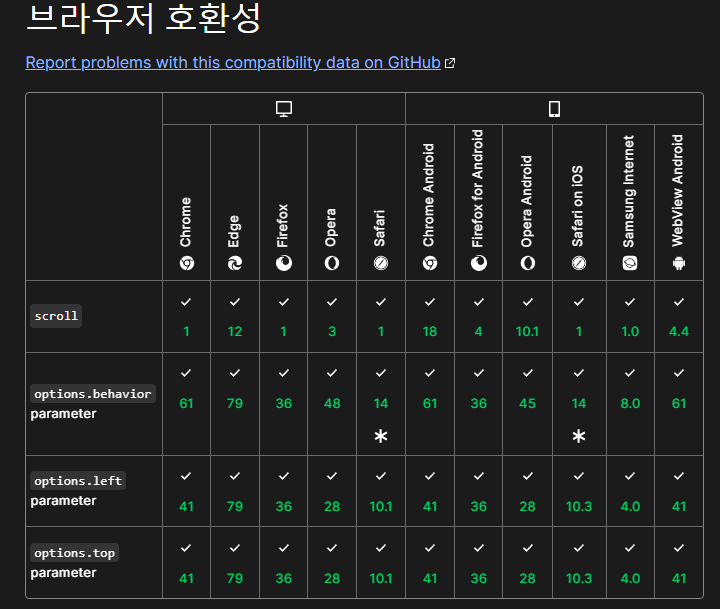
아래와 같이 크롬은 최신버전이지만, smooth 속성이 적용되지 않는 현상이 나타났다.


호환성에도 문제가 없지만 MDN의 예제를 실행해 봐도 크롬에선 soomth 속성이 사용되지 않았다.
MDN 스크롤 예제 https://developer.mozilla.org/en-US/docs/Web/CSS/scroll-behavior

크롬 브라우저 설정을 따로 해주면 해결된다고는 하지만, 내 PC에서만 작동하는 건 근본적인 해결방법이 아니기 때문에 배제했다.
참조
http://www.devdic.com/css/refer/properties/property:1195/scroll-behavior
scroll-behavior::CSS 레퍼런스
scroll-behavior 속성은 유저 에이전트(user agent) 별로 지원 여부 또는 옵션 지원 여부에 따라 작동하지 않을 수도 있다. W3C 모듈 스펙에 따르면 유저 에이전트(user agent)가 이 속성을 무시할 수 있다고
www.devdic.com
smoothscroll-polyfill - 적용실패
사용법: https://www.npmjs.com/package/smoothscroll-polyfill?activeTab=readme
// 패키지 설치
// yarn add smoothscroll-polyfill

// 최상단 파일

import smoothscroll from "smoothscroll-polyfill";

if (typeof window !== "undefined") {
    smoothscroll.polyfill();
}
브라우저 호환성 적용읠 위한 패키지라고 하는데, 본인에겐 효과가 없었다.
scroll 이벤트를 통한 스크롤 이동 적용
스크롤만 이용해서 기능을 적용할 생각이었기에 직접 만들기로 했다.
addEventListener를 통해 스크롤 이벤트를 감지해 주는 hook을 만들어줬다.
// 스크롤 위 아래 여부 확인
import { useState, useEffect, useRef } from "react";

interface MutableRefObject<T> {
  current: T;
}

export const useScroll = () => {
  const [scrollCheck, setScrollCheck] = useState("");
  const prevScrollPos: MutableRefObject<number> = useRef(0);

  useEffect(() => {
    const handleScroll = () => {
      const currentScrollPos = window.pageYOffset; // window객체의 pageYOffset 를 통해 현재 스크롤 위치 저장
      if (currentScrollPos > prevScrollPos.current) { // 스크롤 위치에 따른 스크롤 진행 방향 검증
        setScrollCheck("DOWN");
      } else {
        setScrollCheck("UP");
      }
      prevScrollPos.current = currentScrollPos; // 사용된 현재 스크롤 위치를 다음 이벤트 비교대상으로 저장
    };

    window.addEventListener("scroll", handleScroll); // event 등록
    return () => {
      window.removeEventListener("scroll", handleScroll); // event clear
    };
  }, [prevScrollPos]);
  return {
    scrollCheck, // up/down 여부 return
  };
};

// hook 사용 컴포넌트
import { useScroll } from "@/hooks/useScroll";
const { scrollCheck } = useScroll();
useEffect(() => {
    if (scrollCheck === "UP") {
      console.log("scroll UP");
    }
    if (scrollCheck === "DOWN") {
      console.log("scroll DOWN");
    }
  }, [scrollCheck]);
원하는 값이 잘 나오는 것을 볼 수 있다.

스크롤 이벤트 특성상 한 번 휠을 돌릴 때마다 많은 호출이 일어나기 때문에 필요한 경우에만 사용될 수 있도록 setTimeout 등을 통해 적용하고자 하는 코드에 맞게 함수 실행을 조절해줘야 한다.
import { useState, useEffect, useRef } from "react";
import { scrollToSmoothly } from "@/components/profile/SmoothScroll";
import { useScroll } from "@/hooks/useScroll";
const { scrollCheck } = useScroll();
  const scrollRef = useRef({ // window.innerHeight 값 저장
    height: 0,
  });

  const smoothScrollHandler = () => {
    let maxHeight = window.innerHeight * 6; // 최대 스크롤 길이
    let currentHeight = scrollRef.current.height; // 현재 스크롤 저장
    if (scrollCheck === "UP" && currentHeight !== 0) { // scroll up이고 맨 위가 아닐 때
      scrollRef.current.height -= window.innerHeight; // useRef에 이동할 height 조정
      scrollToSmoothly(scrollRef.current.height, 500); // 이동할 height까지 500ms동안 이동시킬 함수 (requestAnimationFrame 사용)
    } else if (scrollCheck === "DOWN" && currentHeight !== maxHeight) { // scroll이 down이고 맨 아래가 아닐 때
      scrollRef.current.height += window.innerHeight; // 상기 동일
      scrollToSmoothly(scrollRef.current.height, 500);
    }
  };

  useEffect(() => {
    smoothScrollHandler();
  }, [scrollCheck]); // useScroll()을 통해 구분한 UP/Down이 변경될 때마다 실행
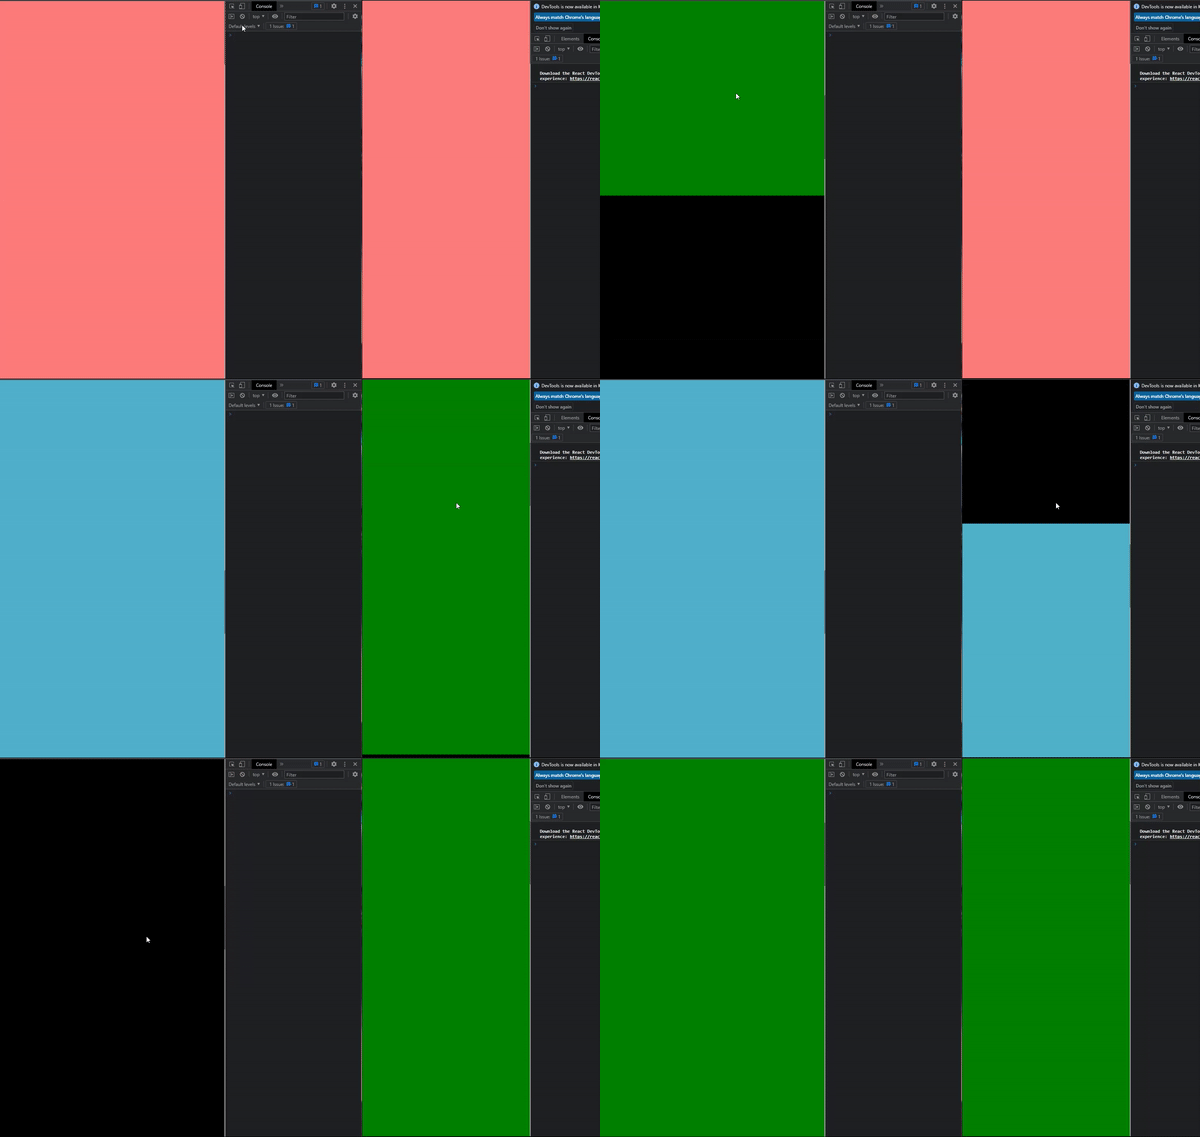
위의 함수를 실행하면 아래와 같이 그나마 정상 작동하는 모습을 볼 수 있다.

a 태그를 통한 스크롤 이동
a 태그의 href 속성을 이용해 간단하게 스크롤을 이동시키는 방법도 있다.
<ProfileContainer>
      <NavBtn>
        <Link href="#box1">1번박스로 이동</Link> // nextjs에서 Link는 a태그의 역할을 한다.
        <Link href="#box2">2번박스로 이동</Link> // href에 스크롤을 이동시킬 'ID'를 입력하고 클릭하면
        <Link href="#box3">3번박스로 이동</Link> // 해당 ID요소로 스크롤을 이동시킨다.
        <Link href="#box4">4번박스로 이동</Link>
        <Link href="#box5">5번박스로 이동</Link>
        <Link href="#box6">6번박스로 이동</Link>
      </NavBtn>
      <TestContainer1 id="box1" />
      <TestContainer2 id="box2" />
      <TestContainer3 id="box3" />
      <TestContainer4 id="box4" />
      <TestContainer5 id="box5" />
      <TestContainer6 id="box6" />
</ProfileContainer>
참조
https://developer.mozilla.org/en-US/docs/Web/CSS/scroll-behavior
scroll-behavior - CSS: Cascading Style Sheets | MDN
The scroll-behavior CSS property sets the behavior for a scrolling box when scrolling is triggered by the navigation or CSSOM scrolling APIs.
developer.mozilla.org
https://developer.mozilla.org/en-US/docs/Web/API/Window/scroll
Window.scroll() - Web APIs | MDN
The Window.scroll() method scrolls the window to a particular place in the document.
developer.mozilla.org
https://developer.mozilla.org/ko/docs/Web/API/window/requestAnimationFrame
window.requestAnimationFrame() - Web API | MDN
화면에 새로운 애니메이션을 업데이트할 준비가 될때마다 이 메소드를 호출하는것이 좋습니다. 이는 브라우저가 다음 리페인트를 수행하기전에 호출된 애니메이션 함수를 요청합니다. 콜백의
developer.mozilla.org
https://developer.mozilla.org/en-US/docs/Web/API/DOMHighResTimeStamp
DOMHighResTimeStamp - Web APIs | MDN
The DOMHighResTimeStamp type is a double and is used to store a time value in milliseconds.
developer.mozilla.org
'개발일지 > React' 카테고리의 다른 글
| React 공통 컴포넌트 제작 (input, button) (0) | 2023.04.13 |
|---|---|
| React Form event type (feat. 타입 단언 as) (0) | 2023.04.13 |
| React 함수형 컴포넌트와 Class형 컴포넌트 생명주기 (0) | 2023.03.23 |
| React useCallback을 이용해 함수 재사용하기 (0) | 2023.03.16 |
| React useMemo 사용하기 (0) | 2023.03.16 |


댓글